We frequently use our phones to fix problems (call or Google) whenever they arise. But what if something goes wrong with your phone? What if SOS or SOS just appears on your iPhone and you are unable to solve it? Therefore allow us to assist you with these straightforward remedies.
iPhone screen with only SOS visible
No, you didn’t accidentally enable a setting. And sure, you can only remove SOS from the status bar of your iPhone. How? To find out all the solutions, keep reading.
What Does the iPhone SOS Mode Do?
iPhones have a function called SOS mode that can be useful in an emergency. It enables users to convey their location to their emergency contacts and call for assistance quickly and conveniently. Users of iPhones must press and hold the side button as well as one of the volume buttons for a few seconds in order to activate SOS mode. Users can slide the SOS slider on the screen to place an emergency call by doing this. Users can create emergency contacts in the Health app in addition to dialing emergency services. When SOS mode is active, these contacts will be informed of the user’s position, and they can also be called directly from the emergency screen. It’s important to note that turning on SOS mode will also disable Face ID, Touch ID, and other biometric authentication systems, necessitating the entry of a passcode in order to open a user’s device. In an emergency, the SOS mode is a helpful feature that could save lives and provide users piece of mind. In order to be ready in case of emergency, iPhone owners need become familiar with how to activate and use this feature.

How To Define SOS Only On An iPhone
You can see an SOS or SOS only in the top-right corner of iOS 16 and the top-left corner of iOS 15 and before if your iPhone is unable to effectively connect to a cellular network. This means that you are unable to use cellular data, send or receive texts, or make or receive phone calls. However, you can phone 911 or the relevant authorities and use the emergency SOS service. You are not in the coverage region, which is the most straightforward answer.
Australia, Canada, and the United States are the only countries that can use the feature. The status bar will display a No Service or Searching error anywhere else. Next, let’s discuss how to fix the SOS only problem. Here’s how to resolve the No Service error problem if you’re experiencing it.
Fixing SOS Only On An iPhone
If your network coverage is fine, attempt the following steps to disable SOS exclusively on your iPhone.

1. Switch the cellular data on and off.
A network issue may have caused your iPhone to become stuck in the SOS-only mode. Then when you turn off and then turn on cellular data, it makes an attempt at a new connection, mostly correcting the problem.
Step 1: Choose Cellular/Mobile Data under Settings.
Step 2: Turn off mobile data and cellular data.
Step 3: After a little delay, turn on cellular data or mobile data.
- You may also open the Control Center and select the Cellular Data icon to turn off cellular data. After a short while, tap it to make it active.
- To deactivate it, tap the Cellular Data symbol.
- To activate it, tap the cellular data symbol.
- Go to the next remedy if your phone’s top status bar still displays SOS.
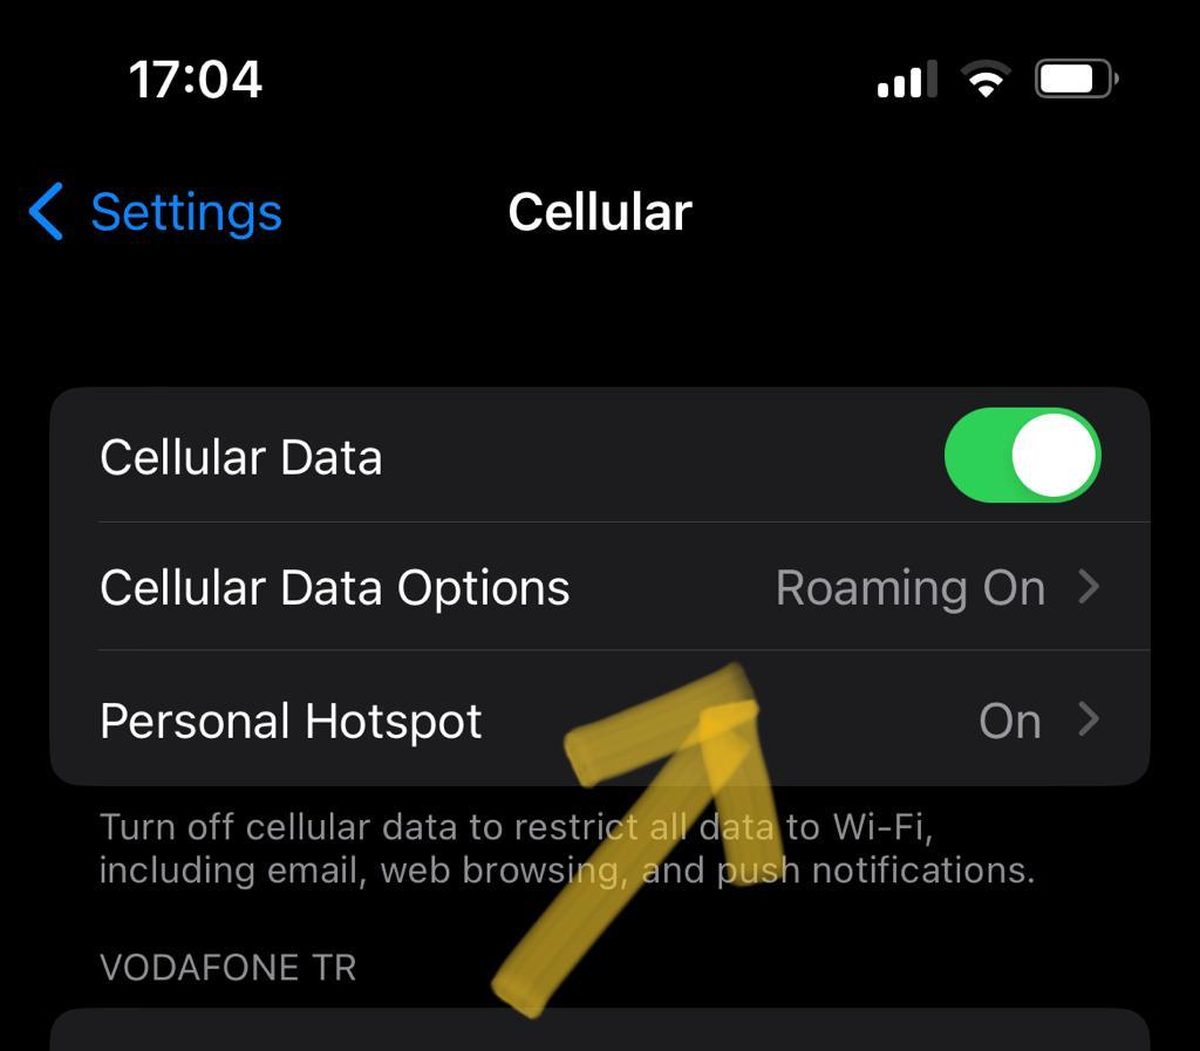
Activate Data Roaming
The blocked data roaming feature may be to blame for the SOS only appearing on iPhones. Hence, if you’re traveling, make sure to check this setting before continuing.
Launch Settings Cellular/Mobile Data
- Turn on data roaming.
- To enable roaming on an iPhone, go to the Mobile Data option.
- Turn on iPhone data roaming
- I’m hoping that 4G or 5G will appear in the status bar rather than SOS.
Use 4G or LTE instead
Your connection and signal quality may be impacted by 5G, which is still not globally operational. Thus, if this issue persists, it’s preferable to turn off 5G on iPhone and remain with 4G. Choose Voice data to activate or deactivate 5G. 4G LTE, 5G Auto, or 5G On options are available. To fix SOS only on an iPhone, restart. The most practical and often used troubleshooting approach. Surprisingly, it largely benefits us as well. In essence, clearing the caches can address any bugs or configuration issues, enabling a steady network connection and resolving the current problem.
Tap and hold the volume up/down and side button at the same time on an iPhone with Face ID until the power-off slider appears. To turn off the phone, slide. Using a Touch ID on an iPhone: Press and hold the side button to bring up the power slider screen. To turn the device off, move the power slider. To turn off your iPhone, slide the power button. Press and hold the power button after the gadget turns off to restart.
Updating Carrier Preferences
These options, which are offered by the carrier, are made to enhance cellular connectivity and overall performance. Although they are typically updated automatically, carrier settings on iPhone can also be checked and updated manually. Nevertheless, before we learn how, make sure your device is turned on and linked to a reliable Wi-Fi network.
Choose General from Settings.
- Tap About in step two.
- The Settings app, select General.
- To update carrier settings, tap about.
- A pop-up will show up if an update is available; click Update to install.
- Depending on when you set up your eSIM, you may need to manually download the updated carrier settings.
- The network bars should return to the status bar once updated; if not, move on to the next step.
Switch the automatic network selection on and off
By ensuring that you are connected to the proper network (carrier), this setting enables a reliable network connection. You can disable SOS solely on the iPhone by turning it off and back on, which forces the device to reconnect to the network.
- Choose Cellular/Mobile Data under Settings.
- Choose Network Selection in step two.
- Flip the switch opposite Automatic off.
- To disable it, go to automatic network selection.
- Turn the automated network selection off.
- Toggle it back on after a brief while.
- On the iPhone 7, enable Automatic Network Selection. SIM re-insertion
- The physical SIM card could interfere with network connectivity, albeit this is rare.
- You may also get rid of SOS-only on iPhone with a quick reset.
- Hence, remove the SIM card from your smartphone, restart your iPhone, and then put the SIM card back in.
- Resetting the eSIM will need you to set it up from scratch, so avoid doing it unless the carrier instructs you to.


Add Comment